在本教程中,您将学习如何在 Debian 11 上安装 Gitlab CE。GitLab 是一个开源的端到端软件开发平台,内置版本控制、问题跟踪、代码审查、CI/CD 等。它是是一个完整的 DevOps 平台,作为单个应用程序交付。
在 Gitlab 功能页面上阅读有关 Gitlab 提供的更多信息。
您还可以查看如何配置 Gitlab 以通过 Gmail SMTP 发送邮件;
配置 Gitlab 以将 Gmail SMTP 用于出站邮件
在 Debian 11 上安装 Gitlab CE
Gitlab 安装要求
以下是在 Debian 11 上使用 SSL/TLS 证书安装 Gitlab 的最低要求。
硬件要求
确保您要使用 Gitlab 托管的系统满足以下最低硬件要求;
- 贮存:足够的存储空间取决于您要存储在 GitLab 中的存储库的大小。
- 中央处理器: 至少 4 个内核。 (最多支持 500 个用户)。
- 记忆:至少 4GB RAM(最多支持 500 个用户)。
- 交换:至少 2GB 的交换内存。
软件要求
- GitLab 需要 Ruby (MRI) 2.6。
- 所需的最低 Go 版本是 1.13。
- 需要 Node.js 10.13.0 或更高版本。 推荐使用 Node 12.x。
- GitLab 13.0 及更高版本需要 Redis 4.0 或更高版本。
数据库要求
Gitlab 仅支持 PostgreSQL 数据库。 下表列出了特定版本的 Gitlab 所需的 PostgreSQL 数据库版本;
| 亚搏体育应用版 | 最低 PostgreSQL 版本 |
|---|---|
| 10.0 | 9.6 |
| 13.0 | 11 |
| 14.0 | 12 |
在要求页面上阅读有关安装 Gitlab 的要求的更多信息。
在 Debian 11 上安装 Gitlab CE
运行系统更新;
apt update
运行以下命令以安装一些必需的软件包依赖项。
apt install curl tzdata ca-certificates openssh-server sudo
在 Debian 11 上安装 Gitlab CE
在本教程中,我们将安装 Gitlab 社区版 CE。
有两种方法可以安装 Gitlab CE。
- 从 APT 存储库在 Debian 11 上安装 Gitlab CE
- 使用 DEB 二进制包在 Debian 11 上安装 Gitlab CE
从 APT 存储库安装 Gitlab CE
要从 Debian 11 上的 APT 存储库安装 Gitlab CE,您需要通过运行以下命令来安装 Gitlab CE 存储库;
curl -sS https://packages.gitlab.com/install/repositories/gitlab/gitlab-ce/script.deb.sh | sudo bashGitlab 软件包仓库完成后,在 Debian 11 上安装 Gitlab;
笔记 在撰写本文时,Debian 11 Bullseye 还没有存储库。 在这种情况下,要从 APT 存储库在 Debian 11 上安装 Gitlab-CE,您可以使用 Debian 10 buster 存储库。
因此,相应地更新回购;
sed -i 's/bullseye/buster/' /etc/apt/sources.list.d/gitlab_gitlab-ce.listapt updateapt install gitlab-ceReading package lists... Done Building dependency tree... Done Reading state information... Done The following NEW packages will be installed: gitlab-ce 0 upgraded, 1 newly installed, 0 to remove and 28 not upgraded. Need to get 954 MB of archives. After this operation, 2,570 MB of additional disk space will be used. Get:1 https://packages.gitlab.com/gitlab/gitlab-ce/debian buster/main amd64 gitlab-ce amd64 14.3.3-ce.0 [954 MB] Fetched 954 MB in 1min 29s (10.7 MB/s) Selecting previously unselected package gitlab-ce. (Reading database ... 30799 files and directories currently installed.) Preparing to unpack .../gitlab-ce_14.3.3-ce.0_amd64.deb ... Unpacking gitlab-ce (14.3.3-ce.0) ... Setting up gitlab-ce (14.3.3-ce.0) ... It looks like GitLab has not been configured yet; skipping the upgrade script. *. *. *** *** ***** ***** .****** ******* ******** ******** ,,,,,,,,,***********,,,,,,,,, ,,,,,,,,,,,*********,,,,,,,,,,, .,,,,,,,,,,,*******,,,,,,,,,,,, ,,,,,,,,,*****,,,,,,,,,. ,,,,,,,****,,,,,, .,,,***,,,, ,*,. _______ __ __ __ / ____(_) /_/ / ____ _/ /_ / / __/ / __/ / / __ `/ __ / /_/ / / /_/ /___/ /_/ / /_/ / ____/_/__/_____/__,_/_.___/ Thank you for installing GitLab! GitLab was unable to detect a valid hostname for your instance. Please configure a URL for your GitLab instance by setting `external_url` configuration in /etc/gitlab/gitlab.rb file. Then, you can start your GitLab instance by running the following command: sudo gitlab-ctl reconfigure For a comprehensive list of configuration options please see the Omnibus GitLab readme https://gitlab.com/gitlab-org/omnibus-gitlab/blob/master/README.md Help us improve the installation experience, let us know how we did with a 1 minute survey: https://gitlab.fra1.qualtrics.com/jfe/form/SV_6kVqZANThUQ1bZb?installation=omnibus&release=14-3
使用 DEB 二进制包在 Debian 11 上安装 Gitlab CE
要使用 DEB 二进制包安装 Gitlab,请从 Gitlab 包页面下载二进制文件并使用手动安装 apt 或者 dpkg 命令;
wget -O gitlab-ce_14.3.3-ce.0_arm64.deb https://packages.gitlab.com/gitlab/gitlab-ce/packages/ubuntu/focal/gitlab-ce_14.3.3-ce.0_arm64.deb/download.debapt install ./gitlab-ce_14.3.3-ce.0_arm64.deb在 Debian 11 上配置 Gitlab CE
一旦安装了 Gitlab CE 包,您就可以安装 SSL/TLS 证书。 有两种方法可以使用 SSL/TLS 证书配置 Gitlab;
- 在 Let’s Encrypt 中使用免费和自动化的 HTTPS
- 使用您自己的证书手动配置 HTTPS
在这个演示中,我们将使用我们自己的自签名证书手动设置带有 SSL 证书的 Gitlab。 如果您打算将您的 gitlab 服务器公开到公共互联网,您可以考虑使用商业 TLS 证书。
创建一个目录来存储 SSL 证书;
mkdir /etc/gitlab/ssl接下来,通过运行以下命令生成自签名 SSL 证书。 请务必在以下命令中相应地替换证书详细信息;
openssl req -newkey rsa:4096 -x509 -sha512 -days 3650 -nodes -out /etc/gitlab/ssl/kifarunix-demo.crt -keyout /etc/gitlab/ssl/kifarunix-demo.key -subj "/C=US/ST=California/L=San Francisco/O=Kifarunix-demo Ltd/CN=*.kifarunix-demo.com/"仅将公共证书文件复制到 /etc/gitlab/trusted-certs 目录。
mkdir /etc/gitlab/trusted-certscp /etc/gitlab/ssl/kifarunix-demo.crt /etc/gitlab/trusted-certs/想改用 Let’s Encrypt 吗? 检查此链接。
在 Debian 11 上为 GitLab 服务器配置 URL
生成证书后,编辑 /etc/gitlab/gitlab.rb 配置文件并替换值 external_url 参数添加到您的 Gitlab CE 服务器 URL 以启用域的 HTTPS。 适当替换域名。
替换 Gitlab 外部 URL 域。
sed -i '/external_url/s/example.com/kifarunix-demo.com/' /etc/gitlab/gitlab.rb启用 Gitlab SSL 设置
接下来,向下滚动到 Gitlab NGINX 部分并进行以下调整(根据您的设置)。
vim /etc/gitlab/gitlab.rb################################################################################ ## GitLab NGINX ##! Docs: https://docs.gitlab.com/omnibus/settings/nginx.html ################################################################################ nginx['enable'] = true nginx['client_max_body_size'] = '250m' nginx['redirect_http_to_https'] = true ... ... nginx['ssl_certificate'] = "/etc/gitlab/ssl/kifarunix-demo.crt" nginx['ssl_certificate_key'] = "/etc/gitlab/ssl/kifarunix-demo.key" ... ... nginx['ssl_protocols'] = "TLSv1.2 TLSv1.3"
有相当多的配置选项选项。 完成配置并为您需要的任何其他服务启用 ssl。
Save 完成配置后退出配置文件。
重新配置综合 GitLab
设置完成后,重新配置 Omnibus Gitlab。 只要有任何配置更改,就需要重新配置。
gitlab-ctl reconfigure
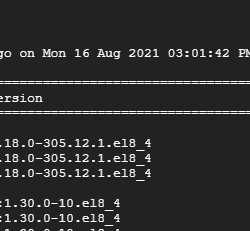
示例命令输出;
... Running handlers: Running handlers complete Chef Infra Client finished, 567/1516 resources updated in 14 minutes 01 seconds Notes: Default admin account has been configured with following details: Username: root Password: You didn't opt-in to print initial root password to STDOUT. Password stored to /etc/gitlab/initial_root_password. This file will be cleaned up in first reconfigure run after 24 hours. NOTE: Because these credentials might be present in your log files in plain text, it is highly recommended to reset the password following https://docs.gitlab.com/ee/security/reset_user_password.html#reset-your-root-password. gitlab Reconfigured!
根据总结,Gitlab登录用户名是 root 并且密码存储在文件中, /etc/gitlab/initial_root_password.
grep Password: /etc/gitlab/initial_root_passwordPassword: kidvQYseZEKzHrtorZ44wLr6ovBbu5bTvgUykFSX354=重置 Gitlab 用户密码
如果要重置 Gitlab 用户密码,请运行以下命令;
gitlab-rake "gitlab:password:reset"该命令将提示输入用户名和密码。
您可以在命令行中指定用户名。 用相应的用户名替换用户名。
gitlab-rake "gitlab:password:reset[username]"喜欢;
gitlab-rake "gitlab:password:reset[root]"检查 Gitlab 服务的状态;
gitlab-ctl statusrun: alertmanager: (pid 2380) 407s; run: log: (pid 2072) 468s run: gitaly: (pid 2415) 406s; run: log: (pid 1507) 1209s run: gitlab-er: (pid 2350) 410s; run: log: (pid 2012) 485s run: gitlab-workhorse: (pid 2327) 411s; run: log: (pid 1917) 545s run: grafana: (pid 2400) 407s; run: log: (pid 2283) 427s run: logrotate: (pid 1430) 1222s; run: log: (pid 1438) 1221s run: nginx: (pid 1951) 511s; run: log: (pid 1962) 507s run: node-er: (pid 2342) 410s; run: log: (pid 1993) 493s run: postgres-er: (pid 2392) 407s; run: log: (pid 2110) 461s run: postgresql: (pid 1644) 1129s; run: log: (pid 1656) 1126s run: prometheus: (pid 2364) 409s; run: log: (pid 2049) 475s run: puma: (pid 1870) 560s; run: log: (pid 1878) 557s run: redis: (pid 1465) 1216s; run: log: (pid 1476) 1215s run: redis-er: (pid 2352) 409s; run: log: (pid 2037) 480s run: sidekiq: (pid 1888) 554s; run: log: (pid 1899) 551s
如果需要重启所有 Gitlab 服务;
gitlab-ctl restart
你也可以使用 start|stop 控制 Gitlab 服务的命令选项。
启动、停止或重启单个组件,例如 nginx;
gitlab-ctl start|stop|restart nginx
访问 Gitlab 网页界面
Gitlab CE 在 Debian 11 上的基本安装现已完成。 您现在所能做的就是访问 Gitlab 网络界面, https://server-IP-or-domain.
如果 UFW 正在运行,则需要打开端口 443/80 以允许外部访问。
ufw allow "Apache Full"
允许来自特定 IP;
ufw allow from 192.168.58.1 to any port 80 proto tcp ufw allow from 192.168.58.1 to any port 443 proto tcp
使用上面提供的密码以 root 用户身份登录 Gitlab Web 用户界面。
成功登录后,这样的界面欢迎您。
用户 root 的 Gitlab 网络仪表板;
Gitlab现在基本上已经安装和设置了。 这标志着我们关于如何在 Debian 11 上安装 Gitlab CE 的教程结束。
参考
在 Ubuntu 上下载并安装 Gitlab
使用 Prometheus 和 Grafana 监控 Gitlab 指标
在 Ubuntu 20.04 上安装带有 SSL/TLS 证书的 Gitlab